Showing posts with label sails and canvas. Show all posts

Monday, July 22, 2024

Sewn Splices


 Traditional splicing of rope eyes is the gold standard, but there are times when it is not practical:

  • The line is old and stiff.
  • It is a line, like climbing rope, that cannot be spliced by conventional methods because the cover is too tight.
  • The position of the splice must be precise.

 Enter the sewn splice. This is often seen on sails, and can be made strong for larger eyes by using more stitching. The strength is about the thread strength x number of passes, and add a 50% safety factor. Also protect from chafe with a webbing or other covering.

I've been using sewn splices for 30 years and I have not experienced a failure yet, though I do cover those that are exposed to chafe.

I made this video for Good Old Boat Magazine as a companion for an article on the topic some years ago.


Friday, July 14, 2023

PVC Pipe Winch Handle Holder

 On my PDQ I installed a short length of pipe to hold the winch handle used at the mast. It was attached with screws.


The canvas holder on my F-24 finally died from sunburn, so came up with a new version. This time it attached with VHB tape and is cut on an angle to hold the handle against the bulkhead. It's cut high enough that there is toe clearance under it.

I considered commercial units, but none were designed to fit tight in the corner. I considered Velcro, but this seems more secure. The only down side is that it does not accept floating handles (too fat).


See the full story on winch handle holders in Practical Sailor Magazine.


Saturday, December 3, 2022

Self-Tailing Winch and a Cam Cleat?

 Yes!

 A cam cleat is much faster to release in gusty conditions. A cam cleat is easier to use when pulling sheets in fast in light conditions. Both my PDQ and F-24 had ST winches with cam cleats factory installed.

 I use the cam cleat nearly as much as the self-tailer jaws, and at some point nearly every day.

[Note. The line routing on the F-24 is all wrong in the image to the right. I just got the boat. Please disregard. The point is the cam cleat under the winch is darn handy.]


Tuesday, September 13, 2022

Boom Brakes and Preventers

 I'm going to come back to this topic. Placeholder.

 Platino preventer rigging. Obviously, the leverage stinks and fatalities resulted.

Accident Report

 ©2018 Maritime New Zealand


Saturday, December 7, 2019

Check Your Furlers

Winter seems to be the season for shredded head sails.

  • Taking the sail down and storing either in the cabin, or better, at home is the best answer if you won't be sailing until spring.
  • You can barber pole the sail with a spare halyard... but this guy did that and it wasn't enough.
 The root cause was a failed UV cover, but poor furling contributed.

  • Furl tightly and wrap the sheet a few times.
  • Check the condition of the UV cover. If it starts to fail it will balloon and pull the sail open.
The difference between a winter gale and a summer squall is that the gale will blow for many hours or even days, while the strong part of the squall is over in 15 minutes.

Sunday, October 27, 2019

Painted UV Strip

Crazy? Probably, but I had an old dog of a sail that wouldn't withstand stitching and needed something.  I tested some paints on test panels, chose one of the best, and ...


... after three a seasons it's still looking good, no pealing.

This is an inflatable paint I have used before (MDR Amazon Inflatable Boat Paint), so I'm not expecting any trouble. It seems to stretch with the cloth and I know it can handle the sun. Would I spec a new sail that way? Undecided.

A full report will be in Practical Sailor next year.

Sunday, September 8, 2019

UV Protection for Sails

Yup another Practical Sailor Teaser.

A year ago I began researching the use of paint for UV protection on roller furling jibs.

I started with test panels on the roof. House paint samples failed right away, either chipping or pealing in strips. But special purpose paints, compounds either for sails or cloth, generally held up pretty well.

Last week my primary jib basically died, with multiple (4) tears through the Kevlar leach. The only thing that kept it from spliting right across was the Sunbrella cover and strong repairs just forward. The foot also developed multiple smaller tears the same day. It was breezy.


Thus, it was time to install my back-up jib, which has only a failed UV Dacron cover.

  • Will the paint stay on? I painted it months ago, I've rolled it in and out a dozen times, and tacked dozens of times, though in moderate wind. So far, it looks and feels good.

Amazon MDR inflatable paint. Left over from the dinghy. It lasted ~ 5 years on an inflatable, with very little pealing, so why not? I'll report aback in a year or so. Sooner, if it fails... but I don't think it will.

Time will tell. I also have samples of painted cloth burning away on the roof. I'm thinking I'm going to leave them until next Fall, and then make them into flags and drive around for a few days, giving them a severe flutter test.

I'm also going to get some quotes on a new jib. Even if the paint does fine, this one is long in the tooth and I don't trust it. I'm about done with laminates for furlers. It's a bad marriage. I'm going with polyester next time. 

I still like a Mylar main. It lives under a cover and does not flog (full battens). Yet both of them (I have two sails of indeterminate age) developed tears along the bolt rope, because the cloth does flex there. Compared to the leach, of course, this is a non-structural area, and is far easier to repair. And unlike polyester, they don't stretch, at all. When it comes to square top sails, that's a big deal.

Tuesday, July 2, 2019

A Few Boat Specific Notes for My Sailing Partners

I installed the new motor mount plate. The replacement is about twice as strong as the original, factory version. Also, I think the PO measured wrong, which is why he needed a spacer under the motor mount. The mount now rests on the transom and is very secure.


The mounting plate is the aluminum strip at the bottom. It is attached to the two big clamps. The two angled slots are to clear the reverse lock.

I also replaced the fuel line assembly with the bulb. It has been getting stiff and not pumping up well.

The motor did die on me once, when I dialed up full throttle for a few minutes to check the mount. I noticed the bulb was sucked flat, suggesting the anti-siphon valve on the tank probably has some dirt in it. When I pumped it up the engine start with an easy pull and ran fine at moderate throttle. I'll take it apart soon.

I then upgraded the shroud tensioner to 8:1 from the previous 4:1. It should now be easy to tension the shrouds in strong winds without leaving the cockpit. They are also easier to release. It was line I had, perfect fit, no leftovers.

It is possible to over tension the rig now, if you get ham-handed. According to the manual, the max tension is about 1600 pounds, which means about 300 pounds on the tensioner. That means do NOT pull more than 300/8 = 37.5 pounds on the rope. A good one arm pull, but no more. It is very smooth.

In the photo you can see a black whipping ~ 5 inches from the cam cleat. This is the light wind setting. At a minimum, pull both adjusters to this position before sailing. This should cover you up to about 6-8 knots. As the wind increases, you need enough tension to keep the lee shroud from going slack and snatching tight; that is very bad for it. I will put two seizings close together at the maximum setting, but it was not windy enough to establish that value today. It's probably about another 9-12 inches up, but we'll see. For now, just enough to take the slack out.


And then I went kayaking. This is just south of the beach near Deale.


Monday, June 17, 2019

Painting a Sail

Rev. 7-25-2024

I used this painted sail for three years before replacing it for other reasons. The paint never pealed.

 No comic book super heroes or advertising logos. Just the UV strip.

Our new-to-us laminate jib is starting to fail along the edge of the sun cover; the cover makes a stiff spot and the flexing is damaging. The cover was also too small and is itself, failing (UV Insignia cloth). If I tried to sew on a new cover the needles holes would destroy the sail, and it's too old to justify the expense and effort, really.

If the ONLY thing we want to due is block the sun, why not paint? For the past year I have had samples of many different paints, ranging from house paint to specialized sail paints on racks on the roof, weathering. Naturally enough, it is a writing project.

I did a few minor repairs first. Yes, the strip tapers; you need more width at the clew than the head.  Normally I hate mini-rollers, but a 4-inch foam roller is just the thing for painting a sail. Pretty easy.

FYI, the sheets under the sail are there to protect the sail from the asphalt more than to keep the paint off the driveway.

Another advantage of paint is that it is light. I don't care about the effect on set, but I do care about the extra weight flogging against the vulnerable leach fabric. None of the sailmakers recommend Sunbrella, for example, on laminate sails. for this reason.

  Although the roof top exposure tests are not complete, I selected MDR's Inflatable Boat Topcoating. It seemed to be among the top performers, I've used it on inflatables, it got a top rating from Practical Sailor some years ago, and I had enough left over. Free is always nice.

No, I don't expect it to last as long as a Sunbrella cover. Neither will the rest of the sail. But it also cost me only 15 minutes work and $15 worth of leftover paint.

Look for a detailed report and follow-up in Practical Sailor Magazine.

Friday, May 31, 2019

Shroud Tensioner

rev. 7-25-2024

This probably won't interest most readers, but a fellow F-24 owner wanted some images.

Because the F-24 folds, a quick release of cap shroud tension is required. Pulling the shrouds aft with a tackle is a simple way. This can either be a cascade:

I have since re-rigged this as 8:1 and the tail slack is pulled under the tramp with a bungee (out from under foot and can't wash off the deck). The only reason to rig it 4:1 is so a gorilla can't over tension at the dock. With 8:1 you can tension under full sailing load and get it right.


or a straight tackle:


A cascade places only 1/2 the load on the blocks and can thus be built using lighter gear. This is commonly done with vangs, for example, which also have a small range of travel. The only advantage of a straight tackle is that it can be adjusted through a greater range.

The PO (previous owner) probably used the blocks in a 4:1 tackle. I'm not sure why he went to a cascade, but it works very well. I assume he went to 2:1 on the blocks to avoid over tensioning, but I may go to 4:1 (the pulleys are there ) to make it easier to adjust under load, simply remembering not to yard on it.

Friday, April 12, 2019

Why Not Webbing?

As I did more with low friction rings, it became evident that rope is not the best material for sliding. Double braid can get lumpy and is high friction. Single braids, like Amsteel flatten under load, leading us to the obvious conclusion that webbing is better for some things. 

By including loops at several points, it can adjust to various reefing heights. This boat uses roller reefing, so there is no jiffy-reefing tack line.


For example, webbing has been used for years in dinghy Cunninghams. The purchase is doubled by running it through the Cunningham eye, but it's just a regular grommet. Webbing runs more smoothly, with less friction.

Webbing is perhaps the most traditional method of attaching sail slugs to the mainsail. Wrap 2-3 times and sew.

So what about other applications?

  • Lifeline lashings.
  • Sewn to the jib or reacher sheets at the end, there is nothing to hang up on.
  • Slab reefing outhaul tackles. Less friction through the clew ring.
  • Furler line. I use webbing on the reacher--I can fit more on the drum that way. The webbing is spliced to a larger rope tail.
  • Control lines that are underfoot on deck.
This is also similar to what we do when we strip cores, such as on furlers. I'm aware of that. You don't want to handle it under load and it does not play well with winches.

Ideas?

Saturday, March 9, 2019

Riding Sails

Some boats hunt all over the place in a breeze. Yawing through 90 degrees can double the force on the anchor and quadruple the forces working to twist it out. First, there are solutions related to the anchor and rode:
  • All chain. Helps right up until the chain lifts off the bottom.
  • Hammer lock mooring. A second anchor, just touching the bottom. Very effective in moderate wind, but can fail if strong enough.
  • Two anchors. A whole nuther' topic, but can work very well. Also complicated, particularly if there are other boats anchored nearby (you will swing differently).
  • Drogue on the chain. Didn't do much for me. You've got to be yawing fast for it to matter.
You can change your windage. After all, that is the source of the problem. Anything forward is like a riding sail at the wrong end.
  • Take the dinghy off the bow. Big difference.
  • Lower you reacher. Big difference.
  • Add a  riding sail aft. We'll come back to this.
And you can change your under water profile.
  • Lift the rudder. A HUGE help. But most people can't do this.
 I've been playing with riding sails. Single luff sails function by pushing the stern to one side, which creates a crude V. The problem is, it is very sensitive to how the boats windage changes with aspect change. Some it works, most not so much:
  • Push the boom to one side. Didn't do much for me. Yawed through the same angle, just to one side.
  • Riding sail. Same problem, plus it flaps when it reaches the extreme travel. Annoying.
I've also tried V-riding sails, with two luffs:

  • This is a Fin-Delta, from Banner Bay Marine. I've heard goo things and need to get my hands on one.

  • A less conventional approach is the V-Delta, conceived by Paratech but not marketed. Even this crude tarp was stable up to 25 knots. The grommets were set in a corner reinforced with only duct tape, and yet they didn't pull. The force is just not that great. It also reduce the yawing more than half, and the higher you set it, the better it works.
This was made from a tarp, and it worked up to 30 knots without even straining. 


 A full awning is possible, but a larger version of the riding sail makes a far more stable awning.

 The orange line is the riding sail. The Blue line is a larger version that serves as both awning and riding sail.


If  I didn't have  bridle, I'd be sewing one of these right now. So simple. Yes, it does increase the rode tension a few percent, but this is FAR less than the wind hitting the boat from the side and swinging it about.
 
I is an evolution on a Paratech design. 


Please share your riding sail experiences. I need to figure out what to test!


Thursday, August 9, 2018

Sun Protection

The sun is a real bugger in the summer. I realize I was spoiled by the big hard top on the PDQ, now that I'm baking in the sun once again.

The water is wonderful, but the air is steamy.

Earlier this week, after enjoying a nice sail, I decided to anchor for a bit in the falling breeze, to eat lunch and eventually do some paddling along the coast. The first thing I did was rig an awning, which was a life saver.

I need to fine-tune the pitch, but this nylon tarp keeps the sun off. Notice some chipping of the paint.

I made it up 10 months ago out of a blue nylon tarp I had. Itis attached to the mast and topping lift, with straps around the shrouds and posts fitted to the stern pulpit. I didn't set the back corners  correctly for this image (I forgot where they went), but you get the idea. The white paint is nothing more than a single coat of Behr from Home Depot, casually slapped on; I learned from another boat that white really drops the temperature.


Which brings us to sails. Every self-respecting furling genoa has a sacrificial UV strip, usually Pacific Blue Sunbrella (which the sailmakers call "everybody blue"). It lasts until the stitching fails, generally about 5-8 years. You can either restitch it for another 5 years, or have it replaced for $400-$800. It's heavy but durable. Some folks use sail cloth or self-adhesive Insignia Cloth from Bainbridge; a waste if you ask me, since they only last 3-4 years.


And then there are light air sails, like this furling laminate reacher, that have no UV cover. We don't leave it up, partially for this reason, and partially because we don't use it most days. But it would be nice to leave it up, if only it had some protection....

You won't see me sewing a UV strip on it. Stitching a Mylar sail is like adding a tear-here perforation.

This jib suffered a 5-foot tear right along the stitch line. The cover was post-factory and the sailmaker that added the cover was an idiot (you need to insert a special scrim or layer of polyester before stitching Mylar). 

 We also know that paint can stick to sails. This is for advertising, not UV (mostly--it must help), but it does last a year.


Can paint provide a serviceable, light, and economical alternative to Sunbrella UV covers? Maybe it won't last as long, but on an older sail, does that really matter? Perhaps the $600 you save is more wisely earmarked for a new sail in 4-5 years.

I'm lining up some test paints. I think you will see a paint UV cover on my reacher in a few months. We don't leave it up much, so I'm sure it will be enough. I doubt the UV cover will ever fail on our Mylar genoa--the sail will explode first. Would I use paint in place of Sunbella on a new polyester genoa? Probably not, but perhaps for an old dog. On a Mylar jib? Yes, I'm thinking it might be the better value, if I can find the right paint. I already know that stitching a cover onto Mylar is questionable at best.

Sunday, January 22, 2017

Outhaul Jammer

As I continue to work on my book on "Faster Cruising" I found myself feeling like the cobler with no shoes for his children; I don't always follow my own advise, even when I know I'm right. In the book I argue that cruising boats are often lack the rigging and hardware needed to make basic trim adjustments quickly and easily, as though cruisers don't care about efficient sailing or understand the fine points. I care, but I have to admit my cruising cat doesn't have the quick access to fine trim that my performance cat had. I aim to fix that.

Case in point. My PDQ 32 came with a good boom and internal reefing, but the main outhaul was secured to an undersized cleat . To tension it under load, you take the tail to a mast-mounted winch, wrap the line under the cleat, and lift the line sharply when taking the line off the winch in an attempt to minimize slippage before that first wrap is on the cleat. Boy scout at best.


A few days ago I removed the undersized cleat (closely spaced holes on the seam) and I tapped four new holes to secure a proper jammer. Now I can ease the outhaul in a blink and tighten with a winch in control.

The smaller line is for the lazy jacks.

Why a double jammer? The few times I have found myself sailing with three reefs (winds gusting to over 30 knots) I found I needed a better way to winch the clew down. The tack is easily secured with a loop through the reefing tack and under the gooseneck, but there is no internal rigging for a 3rd reef. Thus, I tie a bowline around the boom under the reef clew (like the other reefs), go up through the reefing clew, and back to a snap shackle-equipped snatch block at the main outhaul. From there the reefing line is threaded through this new jammer, allowing a mast mounted winch to tension the clew outhaul.

The only challenge is to remember to thread the reefing clew while hoisting.

[The jammer came courtesy of freecycle--it patiently awaited re-purposing for several years in one of my might-need bins. Whooppee!]

Wednesday, January 11, 2017

When to Splice


There's a lot of snobbery surrounding splices and knots, as though knots are only used by hacks that can't splice. The thing is, I know perfectly well how to splice most materials--I've published several articles on testing of splices and knots--but I only splice when it is the logical answer. In fact, I find it embarrassing to have splices where a knot is the better choice.

It comes down to four differences:
  1. knots are easier to redo
  2. splices are stronger
  3. splices are lower profile but longer
  4. knots are more abrasion resistant in double braid

The Marlow Splicing Fid is my long-time favorite for 3-strand. You push it through to open a spot, insert the strand, no matter how frayed, and it pulls it back through. Very fast.


When to Splice.

High Strength
Won't Hold a Knot. This means Dyneema/Spectra in most cases. Fortunately, a bury splice is dead simple and a brummel not much more difficult.

No Room. Rubbing with tackle. Sometimes a knot will get in the way, though often this can be avoided by trying a different knot or rotating it 180 degrees.

Snagging. Splices are generally smoother to run, though flipping a knot over can help.
  • Genoa Sheets
  • Safety Tethers. 
Can't be Constructed Any Other Way
  • Soft Shackles
  • Adjustable Stropes
Adjustable strope. From "Keeping a Cruising Boat on Peanuts."

    The Brian Toss Wand is my favorite for double braid. I use a cut-off hollow knitting needle for single braid.


      When Not to Splice

      Must be Re-Made at Some Frequency.
      • Halyards. First, I like to cut a few inches off every few years to move any chafe spots. Second, halyards are sized for stretch, not strength, and as a result are massively over strength. 
      • Most tackles. Should they twist-up or a component fail, knots are easier to re-do.
      Splice Will Jam. A splice makes the rope fatter. Sometimes this causes a jam in a block. It also keeps tackles farther apart than a knot.
      • Halyards
      • Traveler
      • Davit tackles 
      Abrasion. A double braid splice caries nearly all of the load on the cover on one side, and it is vulnerable near the throat. A knot breaks inside and is thus generally unaffected by wear and UV.


      Old Double Braid

      Even if a splice would be nice, old double braid rope is impossible to splice, IMHO. The solution is either a knot (obvious) or a sewn splice. These can be just as strong as a conventional splice, although they do required protection from UV and chafe. When don properly, they'll last as long as the rope. Much industrial
      splicing is sewn.

      My genoa sheets, made from a salvaged big boat halyard.  The cover is 2-inch tubular webbing. This splice is 5 years old. From "Keeping a Cruising Boat on Peanuts."


      Dynamic Rope

      The tight cover makes a splice nearly impossible. Additionally because it is dependent on both the core and the cover the splice is complex.  Most industrial tethers are sewn.

      This is my deck tether. 8 mm ice climbing rope.
      a. Yes, those are screw lock carabiners. I keep them well-greased, and because of the boat design, they generally stay on the jacklines.
      b. The rope is sewn. Do NOT try this unless you have done a lot of sewn joint testing.
      c. One leg is 2', the other 10'. This is for a cat with narrow side decks and a wide fore deck. On my try I use conventional tethers. 

      But note that I have a storage spot for the spare tether.

      Friday, December 30, 2016

      Seam Rubber

      When my daughter was very small she salvaged a walnut plaque I'd received at some conference for something or other, and gave it for a birthday, along with a few things she'd made. She said I could make something from it, having observed me make cool stuff from scraps all the time. Sweet.


      Fifteen years later I decided my sail finishing bench needed a proper seam rubber, so I scribbled up a plan (above), sawed a section out of the plaque, attacked with a number of power sanders and finally some 400 grit paper, creating a simple, traditional tool that's quite comfortable in the hand. It's a little smaller than customary, but I'm only doing repairs and after a few years of use it still feels just right.

      Better than watching re-runs.


      -----

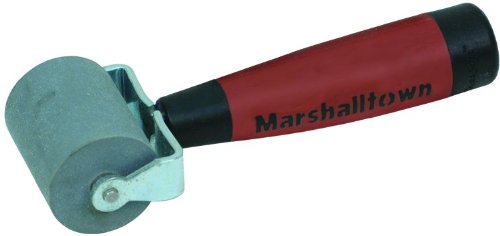
      Can you even buy such a thing? I'm not sure. You can buy one of these for rolling seams when gluing or welding roofing seams, but the sailmakers I've watched all have the home made sort.

      MARSHALLTOWN The Premier Line E54D 2-Inch Flat Commercial Grade Solid Rubber Seam Roller with DuraSoft Handle

      Wednesday, November 2, 2016

      Sewn Eye Splices

      rev. 11-2-2016

      June 2012:

      Splicing is the gold standard for forming permanent eyes and joining lines; unfortunately used double braid generally lacks the flexibility required for splicing; the cover won't open and the core won't slide. Knots are a standard solution and work in most cases; yes, there is some loss in strength, but lines generally die from chafe and I can't remember having one fail at the knot, other than in testing. But sometimes there simply isn't enough space or a knot will snag.

      Seizing is traditional, but it doesn't apply to modern ropes.Nylon get so skinny under load that the seizing gets loose and falls off. Even nylon is far too strong; test shows that 15-20 rope diameters are required to reach full strength. It worked on hemp 3-strand, but polyester is smoother and stronger.

      Hand sewn splices, on the other hand, has been proven proven on my boat for decades, in industry for decades, and I even did a long series of articles for Practical Sailor, pull testing samples to failure (subscribe for the details). It works, and it is WAY easier than splicing old line.
        ____________________________________

      Four years ago I needed new genoa sheets. The old one failed from fatigue (Kevlar core snapped at the clew where it flogged) and I needed a second set to go with my new inside sheet tracks. I found some good line for free (big boats replace halyards with a single wear spot in the center), but knots would hang up and splicing old line is basically impossible.

      First I remove about 1 1/2 rope diameters of core. This will allowed the end to be stitched down to create smooth taper.

      How much stitching is enough? Select a whipping twine that is 10-15% of the line diameter; for example, 7/16-inch line is about 11mm, so #10 whipping twine is a good match. Doubled that suggests about 12 round stitches (doubled, 2 passes, 2 sides, 56 strands total) on each side to reach 8000 pounds. Sure, it is not loaded in-line, but most of the load (about 35-55% in testing, depending on the roughness of the line) is actually carried by line-to-line friction, just as in a seizing. Also remember that due to friction of the eye around the shackle or fitting, the free end is only carrying about 25-35% of the load, depending on line stiffness. The results is that the stitching is only carrying a working load of about 1000*0.30*(1-0.45)=165 pounds and a line failure load of about 1350 pounds; not nearly as demanding as you would guess.

       I hate guessing. I broke over 100 samples during this project.


      Forget the theory.Testing revealed that the total thread strength  is approximately equal to the failure strength. Since the stitching is scattered, distributing the force to every part of the core, the splice is as strong as the line*. However, because wear and UV are real, so Increased it to 20 round stitches on each side of 7/16-inch line, not counting those that secure the taper.

      Whipping Twine Summary
      Twine Number        Diameter       Strength
      #4                            0.4 mm         35 pounds
      #8                            0.8 mm         70 pounds
      #10                          1.0 mm         90 pounds
      #15                          1.5 mm         130 pounds

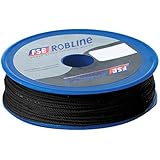
      I went through lots of Robline product...


      Product Details
       But leather sewing twine is a cheaper alternative...

      Candora 260M Sewing Waxed Thread 1MM For Chisel Awl Upholstery Shoes Luggage Set 3 Colors (Beige)

      I also lab tested Spectra and Kevlar thread sewn eyes. It turns out that that Spectra and Kevlar twine make a slightly weaker joint because it is too strong, does not stretch enough to equalize strain, and cuts right through the polyester fibers. On the other hand, Spectra is more abrasion resistant. Either one works.

      Tip: it is easier to push the needle against a board than to use a palm.


      Then cover it with something for UV and chafe protection. Heat shrink is fast and poor choice (doesn't last). Webbing is better in severe applications... like winching a sheet along a shroud.

      I tried heat shrink, but after just 2 days it tore while winching across a shroud. The webbing has been in place for 4 years and is doing fine, if a bit faded.


      I like soft shackles for sheets. Less steel to flog, removable, and as strong as the larger line because it is doubled.If the eye is small it can't fall out easily, but a lashing makes sense. The failure point is always the same; the loop cuts off the stopper knot.  

      I have also switched to soft shackles for spinnaker sheets after a few failures. They are lighter, less prone to coming off, and less damaging to decks and foreheads.

      * This discussion is about polyester and high modulus lines. Nylon is a completely different animal, because when it stretches under load the distribution is thrown off. Imagine sewing elastic--only the first row of stitches actually holds anything. In a nutshell, the stitching needs to be crammed into the smallest practical length, not spread out like you might think. I have sewn nylon line and use sewn nylon tethers, but my procedures were tested. I don't suggest trying and I warn you that most sewn nylon webbing is considerably under strength due to poor understanding of the correct methods. Even sailmakers fail, since they are used to working with low-strech materials. Climbing gear is the guide. Look for bar tacks, such as used on climbing gear, as a sign they know what they are doing.

      Monday, September 21, 2009

      Hood Seafurl 800 Bearing Replacement

      rev. 7-1-2016

      On a pleasant windless day at a dock 150 miles from home, I decided to partly lower our furling genoa so that I could put a few stitches and necessary patches on the sacrificial leech cover. A simple morning task to pass the time in a sailorly way. We were 10 days into a 2 1/2 week cruise around the Delmarva. I released the halyard tension, lowered the sail a few inches, and watched 48 ball bearings merrily dribble onto the trampoline, filter through the netting, and plop into the harbor.

      The furler had been prone to catching for the past few days. It would roll fairly easily for a bit, then seize, and after a good tug, roll easily again. The bearings in this furler are half-and-half stainless and Torlon, and it seems the Torlon bearings had worn down to where the stainless bearings would ride up over them. Eventually, the wedging force pushed the lower circlip out of its groove and the lower race fell apart, unnoticed. My genoa is a little to long on the luff but still, it sets very well with no halyard tention; in fact, some wieght rests on the tack, just a little, and this held the upper race in position. When I went to re-hoist the sail the the foil was lifted by normal friction in the groove, the top half of the furler was lifted, and everything fell apart.

      Although I could no longer furl the sail, I could still use the luff extrusion as a foil, so we lowered the large geona and planned on using the much smaller self-tacking jib for the 3-day trip home. The weather forecast called for strong winds on the nose the first day, followed by spinnaker reaching conditions for the next two days. That is how it worked out, so the loss of the furler was no great handicap.

      Back at home, after considerable stress over the great cost of replacement unit, I set about disassembling the furler drive. It is a simple matter: bring the jib and spinnaker halyards forward and tension with winch; place a pad under the boom and release the topping lift - this relieves some tension from the forestay; remove the plastic set screw between the luff extrusion and the drive tube, remove the split aluminum castings, and while supporting the luff extrusion, gently lower until it rests on the turnbuckle - the luff extrusion will slide right through the drive unit; lift both the luff extrusion and the drive unit and place a vice-grip on the flats of the lower end of the forestay wire - this will support these parts and keep the forestay from turning when the turnbuckle is loosened; remove the cotter pins, and loosen and remove the turnbuckle - it was not necessary to loosen the shroud turnbuckles; remove the vise-grips and slide the furler drive off the forestay, while supporting the luff extrusion; replace the vise grips on the flats to hold the luff extrusion in place.

      Replacing the bearings is quite simple. Each race (4 races) contains 48 x 9/64-inch 440C stainless balls, McMaster-Carr part number 9642K31. Parts are also available at Pompanette Co.. They are most easily installed by assembling the races first, and then inserting them from the bottom up, flipping the assembly over as needed. I used waterproof grease, but if you are using plastic balls and wish to assemble the mechanism without grease you will still need something sticky to hold the balls in place; tooth paste works and will rinse out. I have used it on other projects with Torlon balls. Be certain to tap the circlips securely into their grooves. Be careful to position the four
      set screws into the matching holes in the drive tube. In my case I was not able to separate the stainless steel basket from the bearing tube and thus was not able to reinstall the furler line in the normal manner. However, a clove hitch around the spool with the stopper knot on a dead-end has proven secure. The heads of the set screws provide extra grip.

       Even fully furled, with the sheet around the sail twice, there should be a few turns on the drum.

       If you cannot a proper knot through the hole (sometimes the drum is stuck to the core due to corrosion) the line can be secured with a clove hitch. The set screw nubs are enough to make it secure.

      In my case, since I elected to get rid of the failure-prone mix of Torlon and stainless, I am using grease. To reduce the intrusion of salt spray I fitted a large (~3"x 1/8-inch thick, fitting just inside the tack fitting) polyethylene washer to the top of the stack, just above the top circlip. That is really the only place water can enter. I drilled a small drain in the stainless basket. We will see.

      Notice that I also added a plastic ring above the furler as a drip ring, deflecting rain that drips down the forestay. Does it help? Not sure, but they are still smooth after 4 years. In a few more years I will open it up and re-grease, but for the moment, it feels and sounds (no squeaks or vibration--just smooth) like there is still grease in there.

      What I am actually doing in this photo (11/2015) is spraying water NikWax repellent treatment on the furler line. I sail all winter and this prevents the line from freezing, which can be a big problem.


      Piece of cake. I imagine I will be doing this every 5 years or so, under considerably less mental stress.

      _______

      7-1-2016 update. Still smooth as glass.

      Saturday, June 6, 2009

      Carbon fiber, tapered battens, and a slack leach.

      rev. 2-6-2010

      Before: different boat, but same model, same sails, identical problem.


       I admit it; I'm cheap. And I enjoy fixing anything I can, to prove I can. If I have to fix it though re-design, that's even better, and if the repair method is unusual... better still. I'm a tinkerer.
      The main sail leach on my boat had been falling off to leeward in a terrible way, as much in light winds as stronger stuff. No just an inch or so - a regular S-shape as much 12" to leeward. Another PDQ sailor mentioned that thicker battens had been installed in his main by a sail maker and had worked for him. Being cheap and willing to make a simple thing more complicated, I decided that tapering the battens by stiffening the back 60% with carbon fiber TOW (tension oriented weave or unidirectional fiber) would do the trick and not thicken them so much that they would not fit the pockets. After all, most beach cat battens are tapered. The draft of a sail is tapered - more in the front, and less as you move aft. And it was also a fix and improvement I could finish for the next weekend!
      Batten stiffness is rated by the weight required to deflect a 40" sample by 4". The original battens were 3 pounds for the upper 2, and 4 pounds for the lower 2. The lamination changed this to 8 pounds on uppers and 10 pounds on the lowers, exactly what my back-of-the-envelope calculations using internet carbon stiffness values predicted. Unidirectional carbon works for this project because it is that it is not just stronger than glass, but also much stiffer. If you were to substitute glass it would take many layers and the battens would get too thick to fit the existing pockets. Unidirectional fiber is required; more of the fibers are oriented in the correct direction and they are not deflected into a serpentine path by the cross weave.The forward part of the batten remains nicely flexible. It seems so obvious; the battens on my Prindle were tapered, and in proportion to the PDQ, much stiffer at the leach that the stock PDQ battens.
      A simple job, really, easily accomplished:
      • Sand the batten.
      • Cut the TOWs to size.
      • Laminate one layer of 1" wide by 11 oz. graphite to each side. Taper fibers to avoid a hard spot. I did this by ending the fibers about 6" differently on opposing sides.
      • Sand lightly and add a second coat of epoxy.
      • Sand lightly again, by hand, 220 grit or finer, to get any sharp spots.
      • Epoxy again. Optional; I didn't.
      The carbon tow came from West Marine, though it is not in the catalog. Defender Marine has a 3" x 50' roll, though I think I bought a `15' roll, and that was just enough. I split the 3" roll to long 1" strips with sharp scissors - delicate because it tries to fall apart,  but not difficult. There were no tricks to the laminating, other than starting at the leach end of each batten, adding resin to only about 1-foot of each batten and letting that soak while I added resin to the first 1-foot of the others, and then going back to the first to finish the full length. Doing it this way keeps the fiber in place, rather than having it creep as you brush the resin toward the luff end.

      I am still going to re-cut the sail. I believe I need to remove ~ 3/16" out of 2 seams, 50-70% of the way up. The "after" photo shows some residual sag. But the stiffer battens were a huge help on the sag and treated some vertical wrinkles as well. I will be happy until fall.
      An easy project for any boat with full length, un-tapered battens. Like so many engineering projects, it is invisible when well done... but I appreciate it whenever I look up, I found myself able to walk away from a couple of well-sailed 45-footers (all sail boats heading the same way are racing), and my pocketbook appreciates receiving a few more miles from a good sail. The speed difference is appreciable.

      After: not perfect, but much better!

      Note, 11-18-2012: In retrospect, I would go even stiffer, 1 1/2 layers each side.  Durability has been fine. Well worth doing.