Saturday, November 26, 2016

Singlehanded Tacking--Releasing a Sheet from a Self Tailing Winch

A simple little trick, not often seen in books. A real "ah ha" moment for me, years ago, when I learned this simple trick.

To tack:
  • Make certain you are at full speed.
  • Reduce the number of wraps on the winch to no more than two.
  • Loop the tail around the wrong side of the winch.
  • Release the leeward traveler control. I want the traveler to fall all the way to leeward when I cross the eye of the wind, so that it does not push me back into irons.
  • Set the autopilot  to steer 110 degrees to windward (I single hand a lot).
  • When the jib breaks, wherever you are in the cockpit, simply give the line a yank. 
  • Haul the new working sheet in as the turn is completed. With good timing, only a few cranks on the winch will be needed.
  • Bring the boat up to her true course and bring the traveler back up.  She accelerates better with the main brought in by degrees.
The remaining two wraps will give some resistance, reducing the flapping of sheets, but adjust this to the wind and the boat. I can flip those turns off with a flip of the wrist lick from the other side of the cockpit (which is well out of reach on a cat).

NEVER backwind the genoa. That is a great way to stop the boat and lose control in the waves. I tacked several times yesterday in winds ranging from 25-30 knots in a terrible speed 4-foot chop, with 3 reefs in, and still had no trouble punching through. It is a matter of sequence and sail balance.


I have also gone to 1-piece sheets, where the port and starboard are connected into one loop, like on a beach cats and dinghies. On one hand, you can't coil them up when finished sailing, but I can always get control of both sheets from either side of the boat, it's easy to pull them with me as I move. Tangles are virtually eliminated. There are good reasons dinghies do it this way. I also have two sets of genoa sheets (inside and outside tracks).

I have kept separate spinnaker sheets. I don't jibe that often, and some days I don't even attach both sheets, since I won't be jibing and it keeps the clew light.

Wednesday, November 23, 2016

Best Place for an Anchor Light?


Rev. 7-25-2024

I don't mind climbing that much, but bulbs burn out or corrosion ruins the connection at the worst times, and I'm not climbing up there a some rolly anchorage at the end of a long day, after dark, not just for a damn bulb. It's happened for the last time.

The rule does not say it has to be at the masthead. It says where it "can best be seen," which in my opinion--and many sailors agree--is absolutely not the masthead. Mostly it just looks like a star, way up there, giving no clue as to how far away it is, or helping anyone to actually see the boat. It can be confused with shore lights from a distance, and in an anchorage full of overlapping boats with lights of variable brightness on masts of variable height, it's just confusing. If you are moving directly towards the anchored boat, the shift of the light against the background is not easily noticed, and on a cloudless night there is no background. Every year high-speed dinghies and runabouts strike boats they didn't see, marked by a single light far above their view line. I have always left a cockpit light on in crowded anchorages (LED), which alone is more visible than that useless masthead light, since it lights up the boat and warns off drunken late-night navigators. That is what I do when the masthead light fails, generally adding a cabin light for good measure if in a crowded place. In most creeks, the cockpit light is enough. It would also be nice if I could reach it or at least lower it to the deck for maintenance.


1. A pole on the stern.
2. On the hard top, forward and inside the shrouds.
3. Add a plug an run something up the flag halyard.
4. Use the steaming light and stern light in combination. That gives 360 white coverage.

Commenters have mentioned that sealed LED will solve the reliability problem. Additionally, LED is the only rational answer when power consumption is considered.

Whatever I do will meet the 2-mile viability standard. No point in tempting liability.

Other ideas? But the masthead location is nonfunctional in my opinion.

----

rev.  11/24/2016 (correction 7-25-2024)

Several posters on the PDQ Owners Forum suggested the Davis 3300 Mega Light. LED, photo cell, 

tiny power consumption, plug-in, and deck lighting too. Sounds like the answer.

Unfortunately, based on testing by Practical Sailor, it does not come close to meeting the COLREGS  visibility requirements when fitted with an LED bulb. The problem is that the bulb emitter is in the wrong position relative to the lens and that most of the light is focused into the water when hanging. It does not work.
 

Image result for daVIS 3300 

 The light cone is angled down and is not bright on the horizontal plane.


Friday, November 18, 2016

Failed Tilt Locks--Yamaha 9.9 High Thrust

Warning: If you don't own a PDQ catamaran this post is basically useless to you. I'll post something better tomorrow.

I like these engines. They are generally dependable, easy enough to work on, and deliver more thrust than anything in their class. But the engineering of the tilt lock mechanism is poor and is a familiar lament of PDQ owners. Fortunately, the cure is relatively painless, although it may seem crude. But crude, in the sense that it is simple, is a welcome thing to cruisers.

I suppose if the engine was mounted hanging off the back of a trailer boat it would be reasonable to keep it lubed in all the right places and to hose it off now and then. It would actually get to dry. But cooped up in the wells it gets corroded and stuck. Within 3 years I found myself having to use a winch handle to flip the tab down on the port side, and by now both the up and down motions are nearly locked. And when it finally locks, the engine will be stuck up or down and there's nothing you can do about it...

... Short of get in the water and fix it. Not as bad as it sounds. The first time this happened to me, nearly a decade ago, I had no idea what had happened and ended up tying the engine down with a rope for the rest of the cruise. Which actually worked fine, leading to this solution:
  • If the engine is stuck in the down position, remove the trim pin that the engine locks onto. Lift it up.
  • With pliers, remove the cotter pins and remove the latching mechanism and springs. No more lock.
  • Put the trim pin back in, if you took it out.
Now the engine will go up and down easily with the standard tackle, it just won't lock down, which means no reverse. Some owners have rigged up pulley systems, but I like to lift the covers and check for water flow, so I use something simple. A strap to hold the engine down.

The loop stabilizes the strap and keeps the pull handle from getting mangled.


  The attachment point in the back is a stainless bolt hanger, a rock climbing tool that makes for a cheap, strong, single bolt anchor. The bolt is existing.
 

Dead simple to make, it requires only a bit of webbing, a short lever strap, and a carabiner.
  • Make a loop from about 20 inches of 1-inch webbing and sew it to one end of the strap. About 20 ful stiches with #4 whipping twine will do. Trim the length of the strap  so that latch is in the center of the engine cover.
  • Sew a loop in the other and of the strap to attach the carabiner. In my case, the strap had a loop but it was too short, so I extend it with some line. I have the strap. Better, just sew the loop the right place.
  • Install a stainless bolt hanger (any climbing store or buy on-line) over the bolt at the back the dead-end the lifting line.
To install, slide the loop down the inside of the handle on the front of the motor, pull it forward, and thread the rest of the strap through it. Tighten down the resulting girth hitch/luggage tag and place the strap over the engine. clip to the bolt hanger. Tighten down for reverse, loose and lay off to the side for forward. If you are not going to use reverse, it need not be attached.


Friday, November 11, 2016

High Lifelines

Standard lifelines are only slightly above the knee; helpful if sliding, but not reassuring while walking. For example, reaching over the side to add a sheet to a sail clew can be a little unnerving.

While researching jacklines materials I came a cross a lot of references to high lifelines, rigged to the shrouds. I poo-pooed the idea for years, but now that I have actually tried, it, I think I was wrong, at least for this boat. Yes, they are in the way just a bit, but they make going around the side without a jackline that much safer, they make it safer with a long tether, and they make it better when rough or for those with balance problems.

I used a length of old Kevlar genoa sheet (you want something non-stretch). I investigated all manner of fancy shroud attachments, but a clove hitch worked best, with a little tape under it to prevent sliding down.
  • Attach the high lifeline in such a way that the tension is carried by the lifeline, not the stanchion. It looks like I tied the forward end to a stanchion, but it is actually secured to an eye in the lifeline for a forward gate. The aft end is tensioned with a lashing to another gate terminus.
  • Use very low stretch line, either Kevlar or Dyneema. However, bare Dyneema would be very difficult to secure to the shroud; it would need to be covered with polyester jacket that that point. In truth, the larger diameter line makes a better hand hold.
  • Unlike conventional lifelines, there is no taboo against leaning on it. The horizontal force is carried by the shroud.

Reaching out feels casual with a lifeline at your waist.That water is only 45F. Falling in under spinnaker, even on a calm day like this, could be life threatening. Note that I am also clipped to a short tether.

The high line makes a good handline that doesn't stress the stanchions.

I've been using these for two years by now and I am hooked. Though I still use a tether if it is rough (and for these pictures), in actual fact the new line frees me from the tether on most days, since the bow and stern of a catamaran are very broad and safe in moderate conditions.

Wednesday, November 2, 2016

Sewn Eye Splices

rev. 11-2-2016

June 2012:

Splicing is the gold standard for forming permanent eyes and joining lines; unfortunately used double braid generally lacks the flexibility required for splicing; the cover won't open and the core won't slide. Knots are a standard solution and work in most cases; yes, there is some loss in strength, but lines generally die from chafe and I can't remember having one fail at the knot, other than in testing. But sometimes there simply isn't enough space or a knot will snag.

Seizing is traditional, but it doesn't apply to modern ropes.Nylon get so skinny under load that the seizing gets loose and falls off. Even nylon is far too strong; test shows that 15-20 rope diameters are required to reach full strength. It worked on hemp 3-strand, but polyester is smoother and stronger.

Hand sewn splices, on the other hand, has been proven proven on my boat for decades, in industry for decades, and I even did a long series of articles for Practical Sailor, pull testing samples to failure (subscribe for the details). It works, and it is WAY easier than splicing old line.
  ____________________________________

Four years ago I needed new genoa sheets. The old one failed from fatigue (Kevlar core snapped at the clew where it flogged) and I needed a second set to go with my new inside sheet tracks. I found some good line for free (big boats replace halyards with a single wear spot in the center), but knots would hang up and splicing old line is basically impossible.

First I remove about 1 1/2 rope diameters of core. This will allowed the end to be stitched down to create smooth taper.

How much stitching is enough? Select a whipping twine that is 10-15% of the line diameter; for example, 7/16-inch line is about 11mm, so #10 whipping twine is a good match. Doubled that suggests about 12 round stitches (doubled, 2 passes, 2 sides, 56 strands total) on each side to reach 8000 pounds. Sure, it is not loaded in-line, but most of the load (about 35-55% in testing, depending on the roughness of the line) is actually carried by line-to-line friction, just as in a seizing. Also remember that due to friction of the eye around the shackle or fitting, the free end is only carrying about 25-35% of the load, depending on line stiffness. The results is that the stitching is only carrying a working load of about 1000*0.30*(1-0.45)=165 pounds and a line failure load of about 1350 pounds; not nearly as demanding as you would guess.

 I hate guessing. I broke over 100 samples during this project.


Forget the theory.Testing revealed that the total thread strength  is approximately equal to the failure strength. Since the stitching is scattered, distributing the force to every part of the core, the splice is as strong as the line*. However, because wear and UV are real, so Increased it to 20 round stitches on each side of 7/16-inch line, not counting those that secure the taper.

Whipping Twine Summary
Twine Number        Diameter       Strength
#4                            0.4 mm         35 pounds
#8                            0.8 mm         70 pounds
#10                          1.0 mm         90 pounds
#15                          1.5 mm         130 pounds

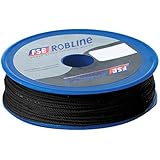
I went through lots of Robline product...


Product Details
 But leather sewing twine is a cheaper alternative...

Candora 260M Sewing Waxed Thread 1MM For Chisel Awl Upholstery Shoes Luggage Set 3 Colors (Beige)

I also lab tested Spectra and Kevlar thread sewn eyes. It turns out that that Spectra and Kevlar twine make a slightly weaker joint because it is too strong, does not stretch enough to equalize strain, and cuts right through the polyester fibers. On the other hand, Spectra is more abrasion resistant. Either one works.

Tip: it is easier to push the needle against a board than to use a palm.


Then cover it with something for UV and chafe protection. Heat shrink is fast and poor choice (doesn't last). Webbing is better in severe applications... like winching a sheet along a shroud.

I tried heat shrink, but after just 2 days it tore while winching across a shroud. The webbing has been in place for 4 years and is doing fine, if a bit faded.


I like soft shackles for sheets. Less steel to flog, removable, and as strong as the larger line because it is doubled.If the eye is small it can't fall out easily, but a lashing makes sense. The failure point is always the same; the loop cuts off the stopper knot.  

I have also switched to soft shackles for spinnaker sheets after a few failures. They are lighter, less prone to coming off, and less damaging to decks and foreheads.

* This discussion is about polyester and high modulus lines. Nylon is a completely different animal, because when it stretches under load the distribution is thrown off. Imagine sewing elastic--only the first row of stitches actually holds anything. In a nutshell, the stitching needs to be crammed into the smallest practical length, not spread out like you might think. I have sewn nylon line and use sewn nylon tethers, but my procedures were tested. I don't suggest trying and I warn you that most sewn nylon webbing is considerably under strength due to poor understanding of the correct methods. Even sailmakers fail, since they are used to working with low-strech materials. Climbing gear is the guide. Look for bar tacks, such as used on climbing gear, as a sign they know what they are doing.

Sunday, October 30, 2016

Stop Horsing Around


rev. 8-14-2024

Last time I visited Oxford there was this one boat sailing about her anchor (also known as horsing) so aggressively at first I assumed they were trying to brake the at anchor out. After a fashion, I guess they were.

Anchored with a combination rode (a little chin on the bottom and a lot of nylon rope) and perhaps 7:1 scope, judging from the angle of the rode, the boat was sailing back and forth over a dist of over 100 feet and more the 30 degrees from one tack to the other. Fortunately there was room, though any boats leaving the adjacent marina would have to watch their timing.

An over-sized tender on the foredeck makes an excellent sail.


Why so active? A combination rode doesn't help. It's light, does not rest on the bottom, and does little to damp the motion, as the wind catches first one side of the boat, and then the other. I'm not certain of the underbody, but I assume it was a fin keel design. But perhaps most critical was the oversized tender on the bow, creating windage forward as though they had a small sail hoisted.

A hammerlock mooring. Overkill, perhaps.


I've been using a chain kellet (a loop of 10-20 feet of chain secured to the rode with a sling or soft shackle) for this (hammerlock) on my Corsair F-24 with good results. It's easier than setting up a bridle and works well enough for lunch stops or if I will be on the boat. Overnight I still set the bridle.

It also works if rigged as a kellet, just not quite as well. Rigged as a hammer lock it always drags and won't be lifted off the bottom by the rode tension (rising wind).

 Solutions? In a strong breeze all horsing around could have caused real mischief. They could switch to a chain rode, which would quiet the boat at the cost of weight and handling problems (no windlass). A bridle might help, though not  as much as it would on a catamaran. On a larger boat davits would move the windage aft, where it would contribute to stability. The tender could be deflated, although that is a hassle. They could use a kellet on the rode to add some drag, or drop a second anchor on very short scope (also known as a hamerlock mooring). A drogue could be added to the rode. They could set two anchors in a V.

A riding sail should help (as suggested by 2 commenters). In one sense they've always seemed counter intuitive to me; why would I want to add more windage if a storm might be coming? Additionally, only the v-sort (Findelta, Bannerbay Marine) seem like they'd be effective, and they're a little pricey ($375), take time to rig, add as much windage as a second dodger, and would need to be very tight in a real blow. I think I'd spend the money on some more chain. It doesn't need to be all chain, just more than they are using now. An increase from 10 feet to 50 feet should do it. That gives you mostly chain in shallow water, and enough nylon to avoid needing a snubber.


But they better try something, because if the wind had come up, nothing would have stopped then from popping the anchor loose and sailing right through a marina.


Monday, October 17, 2016

Hate the New CARB Spouts on Jerry Cans?

The solution is a Shaker Siphon. Just a few quick up-and-down pulses and it goes about 60% as fast as pouring from a can (I timed it), but without spilling a drop or straining your back.


Jerry can gas from the local station is about $0.70/gallon cheaper here, and I need to gas the car anyway. I figure the total time is also less than fooling around at the fuel dock.

I promise, you will never lift a can again. Even good under way.


Tips:
  1. The shaker end goes in the jerry can. 3-4 good shakes should start the flow.
  2. The farther you stuff the hose down the tank filler, the faster it runs. More height difference.
  3. Remember that you lift the suction end to stop. Stop a few ounces early so that you can empty the hose into the tank and clear the hose.
  4. Tip the can and place the hose in the lowest corner, and you will get every drop.

[I still use a 1-gallon non-carb can to fill the integral tank on the dinghy outboard. Easier to control when only adding a pint or so.]

I first spotted this as part of a Practical Sailor review titled "Taking the spill out of Fill-Ups."

PDQ 36 Swim Platform


Several years ago I extended the transoms of my PDQ 32 both to improve performance and, more importantly, improve boarding from the dinghy. The molding was more work than many would care to take on, and estimates were the price of a good used car. During the planning phase, several people suggested I should just ad a swim platform, something that could fold out of the way.

This PDQ 36 owner did just that.


It's not the way I would do it. I'm concerned that...
  • the extension would actually add turbulence
  • No buoyancy at low speeds
  • Could be weird backing
  • More trouble to clean
  • Not strong when I back into something (I back into my slip every time)
  • Not as strong if someone jumps of falls down on it.
Weight and materials cost are actually similar, I think: I was able to build with lighter materials.  But it would be easier and faster, without question. I think I would have hinged it at the step and the back edge and had it swing down against the transom, leaving it up underway. I would only do one side. Or they could be molded and held down with some manner of latch, like the Firebird cats... but then why not fix them.

Many possibilities.

Tuesday, October 11, 2016

Let There be Heat!

The Problem. The delivery trip of Shoal Survivor, from Deltaville, VA to Deale, MD took place between Christmas and New Year's (2008-2009); while it was actually quite comfortable at the helm during the day, protected behind the windscreen, it was decidedly chilly watching movies at night, and my daughter and I vowed that we would install heat before the first frost visited us in the next winter.  

The Solution. I belabored the different types of heaters at length. We already had propane, and a spare propane tap existed. The boat was equipped with propane leak detectors and a solenoid valve, further simplifying the decision.  I had a fair idea of the BTU requirement, having spent a few nights on the boat last winter when the temperature dropped into the 20s. I learned that a single 1500 watt space heater didn't quite do it at all and two were just about right. I learned that a vented heater was an absolute requirement, as even cooking with propane in a sealed cabin brought on a slight headache; I'm not certain whether it was lack of oxygen or carbon monoxide.  Applying an appropriate conversion factor (about 3.3 BTUs/watt) and estimating the thermal efficiency at 85%),  5,800 BTUs seem to be the minimum requirement, and perhaps 10,000 BTUs would serve better. The Sig Marine / Dixon P-9000 (5500-7500 BTU output) seemed a reasonable choice and was also the most we really have room for.  A 10 pound bottle of propane should last 50-70 hours, depending on the rate, or most of a season for a $12 refill.

  I  taped a cardboard of the approximate sized to the wall and we lived with it all summer to prove that it was not in the way.


Note on photo: there is a short gap above the heater, between the heater and the air intake pipe. Installation was not finished yet and this was later sealed with a metal band.

Our Experience.

Note 2-19-2010. Winter experience has proven the above numbers. We burned through 20 pounds in 14 very cold December - February days and nights on the boat. I except when on the hook, I have turned the gas off at night and used dock power to run a single 1500 watt space heater. On one very windy 22F night I had to run the heater on low and 2 x 1500 watt heaters in order to keep the entire boat over 70F. I turned the gas off to sleep.

Note 3-24-2013. 3-day cold weather trip (27F-46F). Heater ran most of the time (sometimes on low), plus cooking, and burned about 2-3 pounds each 24 hours. It was off when we left the boat, generally for about 3-6 hours per day.


Installation. While not overly difficult, gas always require meticulous attention to detail. There are Reasoner that on dry land, most jurisdictions no longer allow gas repair and installation parts to be sold to unlicensed individuals. Please be careful, and read-up on the code.

  • The gas line must run through a vapor-tight fitting from the propane locker into the cabin. This is a standard item through West Marine, Defender Marine, or Sig / Dickson. The hose is typically pre-assembled with 3/8" flare fittings on each end, so it is a bit fat. The vapor-tight fitting will accommodate this.
  • 12 volt electric is required for the fan.  The unit will run without it, but the heat output will be somewhat less and it will not be as well distributed. This is another reason we chose this over the Cozy Cabin Heater. The shut-off safety is not dependent on electricity.
  • Installation side clearances are actually quite small for this unit, because the fan circulates cold air around the firebox.  Additionally, the combustion air is drawn through the deck, and around the flu via a double wall pipe. Thus, smokestack never really gets hot on the outside.  The required clearance around the firebox is only 2 inches, and a little bit more around the smokestack. The smoke stack is almost cool enough to hold in your hand by the time it reaches the deck, so no special insulation is needed. The back of the stove and surfaces only a few inches away stay quite cool and no discernible heat is transferred to the bulkhead.
  • Mounting. I suppose I could have simply placed screws in the wall, but it's rather heavy and I decided through bolting made more sense.  The backside ( visible inside the head) fold heads are covered with decorative caps matching those used throughout the boat, and I used acorn nuts and on the heater side of the bolts. The holes were over-drilled, filled with epoxy, and re-drilled. ahead is a shower compartment as well and thus is quite wet.  The bulkhead is foam cored.
  • Through-deck hole for the smokestack. This was the most stressful step, I assure you.  Boring a 3 1/2-inch, gaping hole through the deck and through the salon roof and extremely visible place - not relaxing at all the first time you commit this sort of surgery on the new boat. It went smoothly enough. After drilling the core was removed extending about 1/2-inch back from the edges and the space filled with epoxy thickened with Cabosil (fumed silica) to a peanut butter consistency. The small holes for the mounting screws were also over drilled and, epoxy-filled, and then re-drilled as well. The smokestack comes with a very thick rubber gasket that is not drilled for the mounting screws; the screws drill their own holes through the rubber and make a very tight fit.
  • Heat and epoxy. It is perfectly acceptable to use moderate heat to encourage epoxy to cure more quickly in cool weather. However, there are some caveats: Do not apply significant heat before the epoxy reaches a gel state, as it will become very runny; do not heat thick layers until you are certain they will not exotherm and get hot on their own; it is better to warm the substrate than either the epoxy or the curing mixture after it has gelled.
  • Passing the electric wires and gas lines through the bulkhead near the heater was quite simple. I purchased an assortment set of rubber grommets from Home Depot; the largest and second largest nested fit the gas line, and the smallest one accommodated the 2 x 16 gauge wires.
  • There is a gap in the flue in the picture - that was covered by a collar, not yet installed, that allows for deck movement.Remember that distance between the heater and the roof changes as you go through waves and as people walk on the deck There is also thermal expansion to consider. Provide for some movement.
  • I checked for gas leaks with diluted dish washing liquid and a brush. I have added a simple carbon monoxide detector.  

Note: as of 1-13-2010 the CO monitor has never chirped. There is no odor, moisture, or other side effect. Just like my home gas furnace, in miniature.

  • The optional stack heat shield seems unnecessary. The stack stays pretty cool (maximum175 F with infrared thermometer - hurts, but would not burn very quickly). Also, the guard will only fit if the stack is straight.

  • The deck guard is necessary; the stack (deck cap, included with the heaters and pictured to the left) is a VERY effective sheet grabber and will foul your sheets on every tack. I built a similar custom guard from 1/8" x 3/4" aluminum strap that stands 5" high by 12" across, since the custom guard from Dickson was not streamlined enough to effectively shed sheets.
  •  Distributing the heat. We direct a small pre-existing fan (at first a Hella Turbo, now a Camaro Bora), set on low, at the stack and heater, blowing downwards. It increases the heater out-put by cooling the pipe and exterior, and helps spread the heat evenly throughout the cabin, floor to ceiling, without producing an objectionable draft. I'm sure location is critical, so experiment with your geometry.


About five hours of labor, overall.  The only hideous step was drilling the hole into the propane locker.  That involved boat yoga, worming into one of the under seat lockers in the saloon, which is obviously not designed for human habitation.

Although the heater doesn't get hot on the outside, thanks to the fan and jacket configuration, the glass front gets hot enough to take some paint off your hand. My daughter has also determined that with the door open and the flame set on low, it can be used for somores!

I'm now actually looking forward to our first overnight trip in true winter weather. I like winter: in the summer, there is a limit as to how many clothes you can take off; in the winter it is a simple matter to layer up with modern fleece and stretch products, enough to be comfortable in anything. My other joy is ice climbing; watch me enjoying a New Hampshire icefall at ~ -10F... and loving every moment. There is no swimming in the winter. The wind can howl and often does. Beach combing is different. Many Bay area businesses close for the season. But it is still beautiful.

Experience note, 1-13-2010: operation at the dock and underway has been flawless. Spray and moderate wind have caused no ill effects. Wind gusts of 25 knots apparent have caused flame-outs, but the unit interrupted the gas flow quickly. The heat generally stays in the salon, leaving the cabins quite cool, and so thick blankets are required. I like it that way. At dock, we use small electric space heaters on low in the cabins.

Note on thermal efficiency. The exhaust gases go through a double-pipe heat exchanger, giving up heat to the incoming combustion air. The draft is controlled (there is not too much excess air, as the gas flame is yellow) and waste up the stack is reduced (the maximum stack temperature is only about 285 F by IR thermometer). Thus, depending on the assumptions, the of the heater is about 85% efficient , as good as you will find short of a high-efficiency condensing heater, not available for boats. Most marine heaters are 70-80% efficient and have much higher exhaust temperatures.

10-22-2011: I just returned from another cool weather trip; still working well. As it is a vented heater, it warms the boat without humidity increase, CO or CO2 risk, and is without odor. 

3-24-2013: Some continuing problems with flame blowing out if sailing with wind on beam above 20 knots. I need to upgrade the deflector. No problems at anchor, only with wind on beam. 

A simple. dependable solution, without the complications of forced air heat. Not what I would do if I lived aboard, but just fine for the occasional year-round cruiser.

Thursday, October 6, 2016

Something Lazy, Something Free

Free is always good, except this is not quite free.

Or rather, it is free if you use any sort of holding tank treatment chemical.

 I've done all sorts of holding tank stuff for Practical Sailor Mag. Chemicals, hoses, vent filters. Fun stuff. And in the process, in addition to learning all sorts subtleties, I solved all of my own odor problems, save one; odor from the bowl itself. If I flush with seawater and leave it a few days, there's some stink; sulfate in seawater is converted to hydrogen sulfide by millions of wee bacteria. If I flush with fresh water, it's better, but not zero; I guess something sneaks back down the waste hose, or perhaps up the feed hose. And either way, the bowl tends to get ratty, as marine flush volumes are limited and the water isn't chlorinated. I hate scrubbing.


Place a 20% solution of holding tank treatment in a spray bottle and mist the bowl down with each use, or at least each day, or and certainly whenever you'll be leaving the boat for a while. This cleans the bowl, treats the water in the bowl, and treats the water in the waste hose, preventing stink. And since it's the same treatment you would be using anyway, just subtract this from the usual dosage.

 I haven't scrubbed in months; the treatment eats the waste off. Very lazy.


However, not all treatments work.
Camco TST 4 oz. Orange Power RV Toilet Treatment


  • Pick an scent you like, preferably very mild. I like Forespar Refresh and Raritan CP, but Camco TST Ultra-concentrate is our favorite. These are compatible with any type of holding tank treatment, including bacterial treatments. I tested a bunch for Practical Sailor Mag (February 2012 and December 2012).


    • No blue sterilizing treatments, containing with formaldehyde and the like. Toxic, smelly, stain-prone, and well... gross. Too much like a portable toilet. Very tough on joker valves. Formaldahyde is listed as a human carcinogen. I don't understand why they still make these. Ban them from your boat.
    • No bacterial treatments, like Bactank T3 or Happy Camper. They grow in the bottle and get gross. They are quite effective in the tank, just not for this.
    Less work. Less money.