Wednesday, July 31, 2024

A longer Lasting Joker Valve

11-30-2012, rev. 7-31-2024

Every sailor with a manual head knows that the joker valve is the check valve at the bottom of the head, the one that everything has to pas through, the one that must be changed every 1-2 years, and... the place you will find most clogs.


This time of year folks start talking about winterizing and what they pour in or how they drain out to prevent ice damage. Sometime I hear of things I know are damaging the head, and I just cringe. A resent letter-to-the editor of Practical Sailor got me thinking; we haven't reviewed joker valves and the details.

The Problem: Not all valves do well with chemicals, and few last as long as we'd like.

Don't worry; this will only happen if you use Lysol in the bowl... which a few people do.
 Also, some head treatments contain formaldehyde (stinky blue stuff) and will do the same thing if not well flushed. Ban these from your boat


This Jabsco valve (left) saw only waste and ethylene glycol and lasted 5 years. A valve in this condition actually leaks less than you would expect; although it is gaping, the lips are smooth and the back pressure holds them together. Occasional use of vinegar keeps the lime at bay. The head itself is 16 years old, though I replaced the pump assembly at 13 years (like new now).


First, all common joker valves are dimensionally interchangeable. Yup, Raritan, Jabsco, and Groco all use the same basic dimensions. However, they differ in some molding details and use different rubber compounds. The correlation, of course, is that their chemical vulnerabilities are different and that no single chemical compatibility list will cover all heads. Some are not compatible with vegetable oil, while some are. Some are not even compatible with propylene glycol, though the PG manufacturers would tell you their product is safe for everything.

Propylene glycol can be rough on other parts as well. While PVC and polyethylene do very well, my clear potable water strainer crazed in just 2 winters. Though they were good about replacing it, I just leave it off in the winter now.


Testing: So I lined up bottles in the lab, filled with common joker valves and common chemical concoctions. After 3 months I measured stiffness and leak resistance. And guess what; some were more compatible with winterizing chemicals than others. Some were more resistant to urine than others.


 Then I donated a bunch of valves to friends, both live-aboards and weekend sailors. I waited to hear which valves failed first, and which lasted for years.

Head Manufacturer    Material        Urine Compatibility      Durability (years)   Comments
Jabsco                        Neoprene       Excellent                           1-3
Raritan                       Nitrile            Good                                  2-5
Groco                         Nitrile            Good                                  2-5                     Hard to pump (stiff)
 

Solution: Raritan pH II valves fit Jabsco manual heads and last nearly twice as long. They withstand propylene glycol antifreeze without complaint. They fit perfectly. Yes, they do cost a few dollars more, but less in the long run, and who likes working on heads?

I still use ethylene glycol in my head (automotive antifreeze), even though the Raritan valve can handle it. Why? There are additional neoprene parts in the Jabsco head (flapper and o-rings), and I'm not really all that worried about anyone drinking out of my holding tank.

What about the flexible impeller pumps for raw water and potable water? Some of the raw  water pumps are nitrile and are thus immune to propylene glycol, but some are neoprene. After all, neoprene has a better flex life. There have been reports of PG damaging raw water impellers over the winter, ever since we bought into this well intentioned but wrong conventional wisdom that PG is better for the environment than EG (link). For this, I blow out as much of the PG and hope for the best. So far, so good.

Tip of the day? Winterize all non-potable systems with ethylene glycol.


Hang Em' High

7-16-2012, rev. 7-31-2024

I always liked Clint....

______________________________

Nothing secures a dinghy, specifically a non-RIB inflatable, like lines cris-crossed underneath. No more sway. No more worries about loosing air pressure and strain on the attachment points.

How high does a tender need to be above the water? Surely this depends on the waters sailed, how far it extends behind the boat, and the motion of the boat. It depends on how well secured the tender is to the davits, in case it does take some minor hits.


Often, I see towering, high davits, with tenders swinging far below them. Sometimes it's coastal convenience; they hoist her up when off-shore. Too often, the tackle or attachment bridle were poorly conceived, pointlessly consuming critical space between the tender and the davits. Hoisting bridles waste space and are thus, well... dumb.

In my case, the tender is nestled between the hulls, only extending a bit beyond the sterns. This is typical on cats and makes carrying a tender safely easier. I've also taken steps to shorten the lifting tackle and added a bow spreader bar, such that the tackle is contained almost entirely within the tender, thus consuming no lift space.

An so I can hang her high without towering davits. Triced up, with cris-crossing lines underneath, she snugs up tight in the gap between transoms with no need to remove the engine or hoist her up into the wind. The aft edge is about 4 feet off the water, and top edge just above the deck, convenient for loading.

Very simple.

______________________________

The spreader bar is made from 1-inch x 1/8-inch aluminum square tube that clips the tender floor and D-rings on both tubes, and is clipped to a lifting tackle only 8 inches above the tender floor; you can't just clip the floor of a sport boat, because if the tubes go flat the floor comes out. And tricing lines, of course.

Something Free, Something Lazy

Free is always good, except this is not quite free.

Or rather, it is free if you use any sort of holding tank treatment chemical.

 I've done all sorts of holding tank stuff for Practical Sailor Mag. Chemicals, hoses, vent filters. Fun stuff. And in the process, in addition to learning all sorts subtleties, I solved all of my own odor problems, save one; odor from the bowl itself. If I flush with seawater and leave it a few days, there's some stink; sulfate in seawater is converted to hydrogen sulfide by millions of wee bacteria. If I flush with fresh water, it's better, but not zero; I guess something sneaks back down the waste hose, or perhaps up the feed hose. And either way, the bowl tends to get ratty, as marine flush volumes are limited and the water isn't chlorinated. I hate scrubbing.

The free solution? Place a 20% solution of holding tank treatment in a spray bottle and mist the bowl down each day, or at least whenever you'll be leaving the boat for a while. This cleans the bowl, treats the water in the bowl, and treats the water in the waste hose, preventing stink. And since it's the same treatment you would be using anyway, just subtract this from the usual dosage.

 I haven't scrubbed in months; the treatment eats the waste off. Very lazy.


However, not all treatments work.
  • No blue sterilizing treatments, with formaldehyde and the like. Toxic, smelly, stain-prone, and well... gross. Too much like a portable toilet. Very tough on joker valves. Ban those from your boat.
  • No bacterial treatments, like Bactank T3 or Happy Camper. They grow in the bottle and get gross. They are quite effective in the tank, just not for this.
  • Pick an scent you like, preferably very mild. I like Forespar Refresh, Raritan CP, and Camco TST Ultra-concentrate. These are compatible with any type of holding tank treatment, including bacterial treatments.
Less work. Less money.

Gasoline Additive Corrosion Testing

4-2016, rev. 7-2024

I've been playing mad scientist again, conducting laboratory corrosion testing experiments for Practical Sailor Magazine.

In my experience at least, corrosion products often foul carburetors, and I've learned how to field strip and clean carbs far too well. Can storage additives actually reduce corrosion? I ran some modified ASTM tests to see. Since I've done this for years with engine coolant samples in my day job, this was something I feel very comfortable with. The set-up and procedure is a bit different, but it's still familiar ground.

Standard metal coupons are exposed to e10 in varying conditions for 1 month. To induce galvanic effects they are grouped copper/steel/brass to simulate a tank system and steel/aluminum/brass to simulate a carb bowl.

The test bottles look like this.
 

After exposure, the sealed control looks like this.

Without an additive, with the addition of 0.03% seawater and allowing limited venting, we get this.The black spots are corrosion pits, not dirt.

With a good additive we get this--effectively no corrosion even with salt


And with a poor additive it can be even worse than with nothing at all

Not a realistic test? Actually just an acceleration. The pitting looks very much like this 12 -year old Yamaha 9.9 carburetor; I have 4 of them and they all look about the same, just like the aluminum coupons.


And the successful additives weren't always the ones you would guess or be led to believe by advertising and marine catalogs, not at all. Unfortunately, If I give more than a teaser, PS will strangle me.

I will share this:
  • Without air and water there is NO corrosion by e10.
  • Without saltwater the corrosion is very, very slow. If salt spray, even the TINIEST AMOUNT can sneak into you tank, you're going to have trouble within weeks. The effect was dramatic.
  • One of the very best additives did NOT come from the boat store. The worst ones did. Go figure.
It turns out that the NMMA (National Marine Manufacturers Association)has formed a working group to develop standards for gasoline additives. IT seems they have found that some are damaging their engines.


Tall Step Disease

3-30-2012, rev. 4-20-2018, rev. 7-31-2024

As the knees get older, steps get higher.  Last year, at the Annapolis Boat Show I was sitting on a 45-foot VERY expensive catamaran, along with a group of mature sailors who had the rocks to by said boat. It was VIP and Press Pass Day and there were a lot of well healed folks about. Across the dock was an even more expensive Gunboat 50. Very pretty.


I pointed out that these boats all had tall step disease. A standard step is 7 1/2" x  10", yet even on the largest cats where space  was no real concern, the step pitch measured 11" x 5", I suppose because it looked better. In conversation we also learned that fully 71% of our group had either personally or had a spouse go through knee surgery. Two artificial knees were displayed. My wife has an artificial knee, though she was resting it elsewhere, and I have had serious knee surgery. Are the boat builders so stupid--no, I don't think that is too strong a word--that they don't realize the buyers of these boats are either older or will soon become so?


Until now we have used the "runt box" you see under the helm seat. Honestly, only a 6'6" sailor can reach the floor while seated. We would move this box below the step, where it worked well. But while sailing it wasn't really available and often we didn't bother to move it.

Even younger sailors get worn down by big steps over the course of a long day--I can ride a bike 100 miles in 5 hours yet the steps get to me some days--and so I've been fighting my own battle, on a limited scale. The steps leading up from the cockpit are 14 inches and the steps down below are 11 inches.

I built these low stools (the cabin steps must fit under the swing of the bedroom doors) from scraps and a few squares left over from the cockpit floor project. Thus, they cost only a few hours and some left over materials. I don't think any real explanation is required for a carpenter to reproduce them. For the boat owner and tinkerer, hours spent making sawdust on small projects are not subtracted from out lifespan (yup, I bastardized that a bit).

 
4-20-2018. My F-24 had a similar problem, heading down into the cabin; a big step and a goo chance of hitting your head because of the motion when going down. You basically you had to do an 18-inch drop and my knee didn't like that, so I added a step, much as I had in my Stiletto 27. Step by step, largely from my Good Old Boat article:

Make an oak bracket that will fit a salvaged dinghy seat. The seat makes for a light and strong step with molded non-skid that looks reasonably factory. I sealed the foam core cut ends with epoxy and sanded smooth.

Peal back the carpet, remove adhesive, and sand.

Butter them up with thickened epoxy and bond. Screws secure them while curing.


Secure the carpet with contact cement.

Nearly done.
 
Much better and the recycled seat gives it a factory look. The step lifts out for access to storage under the cockpit.


Gasoline Tank Vent Filters--Better Boat Keeping?

3-7-2012, rev. 7-31-2024

For all the talk and trouble water in the gasoline causes--far worse with e10--to me it's rather conspicuous by its absence that neither owners nor builders ever took a serious look at vent filters. Cars have had sealed tanks fitted with both pressure controls and filters since 1971. I considered this a few times--I've installed very large descant traps on very large chemical tanks--but figured if it was so against the conventional wisdom in the boating community, it couldn't be right. Funny.... That's not like me.

In a prior post I began a discussion of some testing for Practical Sailor. We've got two test boats going at this time. I've started monitoring the humidity inside and outside. Yup, it's drier inside the tank, after filtration. We expect some positives that should add up to a good value proposition for the owner:

  • Drier gas/fuel.
  • Less evaporation, to the tune of $8-$12/year. The unit should last ~ 10 years without service, so that will nearly pay for it.
  • Less loss of volatiles means better starting, particularly in cold weather.
  • Less loss of volatiles means better resistance to phase separation/emulsion blobs. I have only been able to recreate true phase separation from atmospheric absorption if the ethanol evaporates after it is saturated, and I've tried many combinations. This is why we generally only see it in carbs (they're small).
  • Less loss of volatiles mean less gum formation (better solvency).
  • Less loss of volatiles is good for the environment. Yes, that counts.
  • Less oxygen (less convection, more vapor space) means less gum formation.
It won't stop these things from happening in the carburetor, but it should significantly extend gasoline stability in the tank considerably. Preliminary calculations suggest at least double.

But can we demonstrate how this actually effects the fuel over time on a small scale, in a controlled manner? Calculations only go so far, since water condensation and absorption, differential evaporation, and fuel oxidation work together in complex ways. Science project time.

One liter bottles with 500 ml e10, starting levels marked with tape. From left to right:
-  Plain 1/8-inch ID vent.
-  10 ml silica gel descant
-  10 ml activated carbon  adsorbent
 

 There was less gasoline evaporation with silica gel than with carbon.


The metal samples corroded less in the silica gel protected jar.  
 

 The silica gel protected fuel deteriorated least (6 months).


Actually, both carbon and silica gel are both adsorbents that pull water and organic vapors from the air. Silica gel (the packs you find in with your new DVD player) has a high affinity for water, while carbon has a high affinity for organic vapors. However, both adsorb reversibly; that is, if exposed to high temperatures and either clean air, or an excess of something else, they release what they have previously adsorbed. Carbon can be flushed by water vapor and air, while silica gel can be flushed with hydrocarbon and air. Both should have the effect of keeping the tank drier and reducing evaporation, adsorbing and desorbing with each day/night breathing cycle. Both should reduce oxygen in the tank. But how much?

Results in the fall. The long version will be in Practical Sailor.These things can't be rushed. I expect we are going to find the improvements are small and that a sailor won't "feel" any difference. But his engine will start a little easier, he'll buy a little less gas, and have a few less problems. The math works, it just won't bring instant gratification, not like $100 spent on some bit of deck hardware would bring. More like the "pay me now, or pay me later" benefit of changing the oil;   

But meanwhile, like the holding tank vent filter that I installed (and am very pleased with), I've installed a carbon vent filter on Shoal Survivor gas tank and I'm not planning on taking it off.

-------

Note for the spelling or technically obsessed: sometimes I say absorb, and sometimes I say adsorb; both are correct. Alcohol absorbs water. Silica gel adsorbs water. The mechanism is very different and the reversibility is very different. This is the reason adsorbents are so useful.

-------

Although the test filters photographed above were fabricated from PVC, this is NOT safe practice for permanant installation. PVC is not highly resistant to gasoline vapors and the adhesive is quite vulnerable over time.  While it won't fail in this laboratory setting, based on refinery expereince with PVC, the joits will fail if I add heat, vibration, and wait several years.

Fall Maintance and Halyard OCD. Reeving Splice.


22016, Rev. 7-30-2024

In the spring I enjoyed posting a rant about the 7 sins of spring boat work. However, either not all sailors read this blog and follow my sage advise, or perhaps I simply need to these few items to my  growing list of obvious time wasters.

1. Pulling halyards and replacing with messenger lines. Let's look at the case of a typical 45-foot mast:

Capital. 4 halyards x 90 feet x $1.30/ft = $468. Of course, these will last 8 years anyway, so perhaps hiding them for 5 months will stretching that to 10 years. We'll save $117.00 over 8 years. We'll need messenger lines; I'll give you a discount and assume that most are old halyards, so only $150.00, or a $33.00 loss for our efforts. 

Labor. If we are very efficient, it takes us 1 hour each way for all 4 halyards, or 16 hours over 8 years. -$33.00/16 = -$2.06/hour loss.  If all the messenger lines were free (and I have watched people buy them) you would have earned $7.31/hour. Whoopee. And I bet that won't seem like much if just once in 16 x 4 = 64 cycles, your stitching breaks free and the line goes to the mast head and back down to the base.

Those messengers need stored and to be hauled to home and back. More work.

Perhaps the most obvious flaw in the practice is that the lines need not wear at the same points in the winter that they wear in the summer. They can be shifted by simple means: the roller furling jib will be lowered, the topping lift can be raised 1-foot, and the main and spinnaker halyards can be extended 1-foot to hide the normal wear points; pull them out a little further and tie them to the rail instead of clipping them on. That will take only minutes in the fall and seconds in the spring. With simple practice, I suspect the lanes will fail first at one of their normal wear spots and all of the effort of storing the lines will have been for naught. Good exercise, I suppose.

Perhaps they are high-tech lines on a tricked-out "racing" boat. Though she may have Kevlar sails, she's an over weight monohull and pretending to race is rather like a whispering contest. Real race boats can go 20 knots. They have 2 or 3 hulls or or flat bottoms. One designs race too. Handicap racing, particularly hauling lead and cookware around sheltered waters is plain silliness, in my not altogether humble opinion. I feel the same about bowling and golf too, by the way; really, you either win or you don't. Age and weight classes I get.

On my last boat I got 10 years out of my Kevlar halyards, and they are anything but durable. I simply trimmed them a few feet every few years. 

See also Reeving Eye, below.

2.  Hauling for the winter. My last boat was seriously damaged by improper blocking. Really, how many boats are better supported on stands than by water?

Freeze damage is a lesser risk in boats in the water, since the temperature very seldom dips below freezing; the water keeps them (relatively) warm. Every spring I see a few rudders and keels that have been split by ice while stored on the hard; they've seen temperatures they would never see in the water. Yes, you need to be sure of your through hulls and drains.

Off-season sailing. Anyone who would willingly miss the Chesapeake in October shouldn't call themselves a sailor; it's the finest season. Additionally, the cost-per-sail is half when you sail twice as much, or nearly so. Spring commissioning largely goes away. Engines and electronics prefer regular use.

Expense. About $325 to haul/block/launch. Another $1,000 in storage. A total waste. Yes, hauling for painting is unavoidable, but there are plenty of 2-year paints, and that only takes a week.

Insurance. No, hauling is not required and staying in increases rates only about $50/year (they know yards aren't safe places).  You are typically required to "lay-up" for a few weeks (the specific weeks are designated in my policy), but that can be in the water. The only requirement is that "the boat not be available for immediate use", which is simple to document in the log. Don't be dumb enough to have an accident sailing during the designated week.

3.    Taking everything home, for safe keeping. Thanks, but no thanks. I've got enough stuff at house. My marina is safe--in over 20 years nothing has moved on anyone's boat.

4.   Extra lines, but no chafe protection for those they already have. Would you rather have one good climbing rope or 2 ropes that were pulled up from the ooze under the marina?

5. Tarps. Yes, they can help, if well thought out. I've also seen gelcoat rubbed to bare glass, stanchions pulled in, biminis crushed flat, and stands pulled out (the high-wind domino is always a fright to see). Invariably, they blame the damage on the winter, not the tarp. I'm very judicious in my use of tarps.

__________________

I simply feel better knowing that my toy, my alter ego, my escape, is in a continuous state of readiness, to go where I want and when I want. Any illusion of freedom requires that.

But humans are herd animals; if we see a group, we follow the crowd. 

 _______________________

Reeving Eye

 If you are going to pull your halyards, imagine the things that can happen if your tape, thread, or paper clip splice comes apart:

  • The reeving/mousing line falls to the ground, the halyard goes to the masthead, and you have to climb and get it. Annoying or bad, depending on your skills.
  • Both lines fall to the ground. You will have to climb and tread a new line down the mast, not snagging anything or placing the line where it will chafe against wiring and anything sharp. Much worse.
  • The reeving line falls to the ground and the halyard collapses into a piling inside the mast, tangling and wrapping around fasteners, wiring, and through-bolts. This can take days to sort out, if you can sort it out. You'll want to sell the boat. If you contract it out, it can cost thousands.

Instead, connect the halyard to the reeving line with a reeving splice. Do it right.

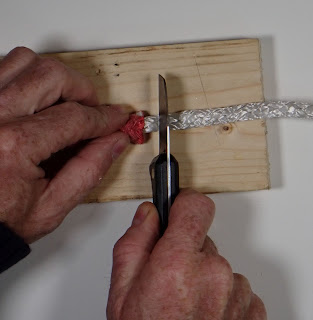
  • Remove about 8-10 inches of core. There is no need to taper it, just cut it square. Milk the cover back out until it extends 8-10 inches beyond the core.
  • Make a very small eye from the cover by burying it back into itself. You don't need a fid, just a length of rigging wire bent into a tightish hairpin. Ideally, the buried cover touches the end of the truncated core, but this is looks not function. Lock stitch to keep it in place. The eyes should be 30-50% line strength, depending on the details. Very strong and no larger than the line itself.
  • Lash the two lines together with heavy whipping twine.
 As a bonus, the eyes will be there next year AND there is no need to whip or otherwise finish the line ends.

Another possibility is to simply stitch the cover flat against itself. Just as functional.


I'll post a video on sewn eyes as soon as I find it. That's a slightly different thing, but it is often the only way to splice a used line.