Pages

Saturday, November 26, 2016

Singlehanded Tacking--Releasing a Sheet from a Self Tailing Winch

A simple little trick, not often seen in books. A real "ah ha" moment for me, years ago, when I learned this simple trick.

To tack:
  • Make certain you are at full speed.
  • Reduce the number of wraps on the winch to no more than two.
  • Loop the tail around the wrong side of the winch.
  • Release the leeward traveler control. I want the traveler to fall all the way to leeward when I cross the eye of the wind, so that it does not push me back into irons.
  • Set the autopilot  to steer 110 degrees to windward (I single hand a lot).
  • When the jib breaks, wherever you are in the cockpit, simply give the line a yank. 
  • Haul the new working sheet in as the turn is completed. With good timing, only a few cranks on the winch will be needed.
  • Bring the boat up to her true course and bring the traveler back up.  She accelerates better with the main brought in by degrees.
The remaining two wraps will give some resistance, reducing the flapping of sheets, but adjust this to the wind and the boat. I can flip those turns off with a flip of the wrist lick from the other side of the cockpit (which is well out of reach on a cat).

NEVER backwind the genoa. That is a great way to stop the boat and lose control in the waves. I tacked several times yesterday in winds ranging from 25-30 knots in a terrible speed 4-foot chop, with 3 reefs in, and still had no trouble punching through. It is a matter of sequence and sail balance.


I have also gone to 1-piece sheets, where the port and starboard are connected into one loop, like on a beach cats and dinghies. On one hand, you can't coil them up when finished sailing, but I can always get control of both sheets from either side of the boat, it's easy to pull them with me as I move. Tangles are virtually eliminated. There are good reasons dinghies do it this way. I also have two sets of genoa sheets (inside and outside tracks).

I have kept separate spinnaker sheets. I don't jibe that often, and some days I don't even attach both sheets, since I won't be jibing and it keeps the clew light.

Wednesday, November 23, 2016

Best Place for an Anchor Light?


Rev. 7-25-2024

I don't mind climbing that much, but bulbs burn out or corrosion ruins the connection at the worst times, and I'm not climbing up there a some rolly anchorage at the end of a long day, after dark, not just for a damn bulb. It's happened for the last time.

The rule does not say it has to be at the masthead. It says where it "can best be seen," which in my opinion--and many sailors agree--is absolutely not the masthead. Mostly it just looks like a star, way up there, giving no clue as to how far away it is, or helping anyone to actually see the boat. It can be confused with shore lights from a distance, and in an anchorage full of overlapping boats with lights of variable brightness on masts of variable height, it's just confusing. If you are moving directly towards the anchored boat, the shift of the light against the background is not easily noticed, and on a cloudless night there is no background. Every year high-speed dinghies and runabouts strike boats they didn't see, marked by a single light far above their view line. I have always left a cockpit light on in crowded anchorages (LED), which alone is more visible than that useless masthead light, since it lights up the boat and warns off drunken late-night navigators. That is what I do when the masthead light fails, generally adding a cabin light for good measure if in a crowded place. In most creeks, the cockpit light is enough. It would also be nice if I could reach it or at least lower it to the deck for maintenance.


1. A pole on the stern.
2. On the hard top, forward and inside the shrouds.
3. Add a plug an run something up the flag halyard.
4. Use the steaming light and stern light in combination. That gives 360 white coverage.

Commenters have mentioned that sealed LED will solve the reliability problem. Additionally, LED is the only rational answer when power consumption is considered.

Whatever I do will meet the 2-mile viability standard. No point in tempting liability.

Other ideas? But the masthead location is nonfunctional in my opinion.

----

rev.  11/24/2016 (correction 7-25-2024)

Several posters on the PDQ Owners Forum suggested the Davis 3300 Mega Light. LED, photo cell, 

tiny power consumption, plug-in, and deck lighting too. Sounds like the answer.

Unfortunately, based on testing by Practical Sailor, it does not come close to meeting the COLREGS  visibility requirements when fitted with an LED bulb. The problem is that the bulb emitter is in the wrong position relative to the lens and that most of the light is focused into the water when hanging. It does not work.
 

Image result for daVIS 3300 

 The light cone is angled down and is not bright on the horizontal plane.


Friday, November 18, 2016

Failed Tilt Locks--Yamaha 9.9 High Thrust

Warning: If you don't own a PDQ catamaran this post is basically useless to you. I'll post something better tomorrow.

I like these engines. They are generally dependable, easy enough to work on, and deliver more thrust than anything in their class. But the engineering of the tilt lock mechanism is poor and is a familiar lament of PDQ owners. Fortunately, the cure is relatively painless, although it may seem crude. But crude, in the sense that it is simple, is a welcome thing to cruisers.

I suppose if the engine was mounted hanging off the back of a trailer boat it would be reasonable to keep it lubed in all the right places and to hose it off now and then. It would actually get to dry. But cooped up in the wells it gets corroded and stuck. Within 3 years I found myself having to use a winch handle to flip the tab down on the port side, and by now both the up and down motions are nearly locked. And when it finally locks, the engine will be stuck up or down and there's nothing you can do about it...

... Short of get in the water and fix it. Not as bad as it sounds. The first time this happened to me, nearly a decade ago, I had no idea what had happened and ended up tying the engine down with a rope for the rest of the cruise. Which actually worked fine, leading to this solution:
  • If the engine is stuck in the down position, remove the trim pin that the engine locks onto. Lift it up.
  • With pliers, remove the cotter pins and remove the latching mechanism and springs. No more lock.
  • Put the trim pin back in, if you took it out.
Now the engine will go up and down easily with the standard tackle, it just won't lock down, which means no reverse. Some owners have rigged up pulley systems, but I like to lift the covers and check for water flow, so I use something simple. A strap to hold the engine down.

The loop stabilizes the strap and keeps the pull handle from getting mangled.


  The attachment point in the back is a stainless bolt hanger, a rock climbing tool that makes for a cheap, strong, single bolt anchor. The bolt is existing.
 

Dead simple to make, it requires only a bit of webbing, a short lever strap, and a carabiner.
  • Make a loop from about 20 inches of 1-inch webbing and sew it to one end of the strap. About 20 ful stiches with #4 whipping twine will do. Trim the length of the strap  so that latch is in the center of the engine cover.
  • Sew a loop in the other and of the strap to attach the carabiner. In my case, the strap had a loop but it was too short, so I extend it with some line. I have the strap. Better, just sew the loop the right place.
  • Install a stainless bolt hanger (any climbing store or buy on-line) over the bolt at the back the dead-end the lifting line.
To install, slide the loop down the inside of the handle on the front of the motor, pull it forward, and thread the rest of the strap through it. Tighten down the resulting girth hitch/luggage tag and place the strap over the engine. clip to the bolt hanger. Tighten down for reverse, loose and lay off to the side for forward. If you are not going to use reverse, it need not be attached.


Friday, November 11, 2016

High Lifelines

Standard lifelines are only slightly above the knee; helpful if sliding, but not reassuring while walking. For example, reaching over the side to add a sheet to a sail clew can be a little unnerving.

While researching jacklines materials I came a cross a lot of references to high lifelines, rigged to the shrouds. I poo-pooed the idea for years, but now that I have actually tried, it, I think I was wrong, at least for this boat. Yes, they are in the way just a bit, but they make going around the side without a jackline that much safer, they make it safer with a long tether, and they make it better when rough or for those with balance problems.

I used a length of old Kevlar genoa sheet (you want something non-stretch). I investigated all manner of fancy shroud attachments, but a clove hitch worked best, with a little tape under it to prevent sliding down.
  • Attach the high lifeline in such a way that the tension is carried by the lifeline, not the stanchion. It looks like I tied the forward end to a stanchion, but it is actually secured to an eye in the lifeline for a forward gate. The aft end is tensioned with a lashing to another gate terminus.
  • Use very low stretch line, either Kevlar or Dyneema. However, bare Dyneema would be very difficult to secure to the shroud; it would need to be covered with polyester jacket that that point. In truth, the larger diameter line makes a better hand hold.
  • Unlike conventional lifelines, there is no taboo against leaning on it. The horizontal force is carried by the shroud.

Reaching out feels casual with a lifeline at your waist.That water is only 45F. Falling in under spinnaker, even on a calm day like this, could be life threatening. Note that I am also clipped to a short tether.

The high line makes a good handline that doesn't stress the stanchions.

I've been using these for two years by now and I am hooked. Though I still use a tether if it is rough (and for these pictures), in actual fact the new line frees me from the tether on most days, since the bow and stern of a catamaran are very broad and safe in moderate conditions.

Wednesday, November 2, 2016

Sewn Eye Splices

rev. 11-2-2016

June 2012:

Splicing is the gold standard for forming permanent eyes and joining lines; unfortunately used double braid generally lacks the flexibility required for splicing; the cover won't open and the core won't slide. Knots are a standard solution and work in most cases; yes, there is some loss in strength, but lines generally die from chafe and I can't remember having one fail at the knot, other than in testing. But sometimes there simply isn't enough space or a knot will snag.

Seizing is traditional, but it doesn't apply to modern ropes.Nylon get so skinny under load that the seizing gets loose and falls off. Even nylon is far too strong; test shows that 15-20 rope diameters are required to reach full strength. It worked on hemp 3-strand, but polyester is smoother and stronger.

Hand sewn splices, on the other hand, has been proven proven on my boat for decades, in industry for decades, and I even did a long series of articles for Practical Sailor, pull testing samples to failure (subscribe for the details). It works, and it is WAY easier than splicing old line.
  ____________________________________

Four years ago I needed new genoa sheets. The old one failed from fatigue (Kevlar core snapped at the clew where it flogged) and I needed a second set to go with my new inside sheet tracks. I found some good line for free (big boats replace halyards with a single wear spot in the center), but knots would hang up and splicing old line is basically impossible.

First I remove about 1 1/2 rope diameters of core. This will allowed the end to be stitched down to create smooth taper.

How much stitching is enough? Select a whipping twine that is 10-15% of the line diameter; for example, 7/16-inch line is about 11mm, so #10 whipping twine is a good match. Doubled that suggests about 12 round stitches (doubled, 2 passes, 2 sides, 56 strands total) on each side to reach 8000 pounds. Sure, it is not loaded in-line, but most of the load (about 35-55% in testing, depending on the roughness of the line) is actually carried by line-to-line friction, just as in a seizing. Also remember that due to friction of the eye around the shackle or fitting, the free end is only carrying about 25-35% of the load, depending on line stiffness. The results is that the stitching is only carrying a working load of about 1000*0.30*(1-0.45)=165 pounds and a line failure load of about 1350 pounds; not nearly as demanding as you would guess.

 I hate guessing. I broke over 100 samples during this project.


Forget the theory.Testing revealed that the total thread strength  is approximately equal to the failure strength. Since the stitching is scattered, distributing the force to every part of the core, the splice is as strong as the line*. However, because wear and UV are real, so Increased it to 20 round stitches on each side of 7/16-inch line, not counting those that secure the taper.

Whipping Twine Summary
Twine Number        Diameter       Strength
#4                            0.4 mm         35 pounds
#8                            0.8 mm         70 pounds
#10                          1.0 mm         90 pounds
#15                          1.5 mm         130 pounds

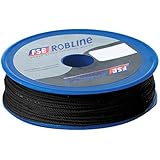
I went through lots of Robline product...


Product Details
 But leather sewing twine is a cheaper alternative...

Candora 260M Sewing Waxed Thread 1MM For Chisel Awl Upholstery Shoes Luggage Set 3 Colors (Beige)

I also lab tested Spectra and Kevlar thread sewn eyes. It turns out that that Spectra and Kevlar twine make a slightly weaker joint because it is too strong, does not stretch enough to equalize strain, and cuts right through the polyester fibers. On the other hand, Spectra is more abrasion resistant. Either one works.

Tip: it is easier to push the needle against a board than to use a palm.


Then cover it with something for UV and chafe protection. Heat shrink is fast and poor choice (doesn't last). Webbing is better in severe applications... like winching a sheet along a shroud.

I tried heat shrink, but after just 2 days it tore while winching across a shroud. The webbing has been in place for 4 years and is doing fine, if a bit faded.


I like soft shackles for sheets. Less steel to flog, removable, and as strong as the larger line because it is doubled.If the eye is small it can't fall out easily, but a lashing makes sense. The failure point is always the same; the loop cuts off the stopper knot.  

I have also switched to soft shackles for spinnaker sheets after a few failures. They are lighter, less prone to coming off, and less damaging to decks and foreheads.

* This discussion is about polyester and high modulus lines. Nylon is a completely different animal, because when it stretches under load the distribution is thrown off. Imagine sewing elastic--only the first row of stitches actually holds anything. In a nutshell, the stitching needs to be crammed into the smallest practical length, not spread out like you might think. I have sewn nylon line and use sewn nylon tethers, but my procedures were tested. I don't suggest trying and I warn you that most sewn nylon webbing is considerably under strength due to poor understanding of the correct methods. Even sailmakers fail, since they are used to working with low-strech materials. Climbing gear is the guide. Look for bar tacks, such as used on climbing gear, as a sign they know what they are doing.